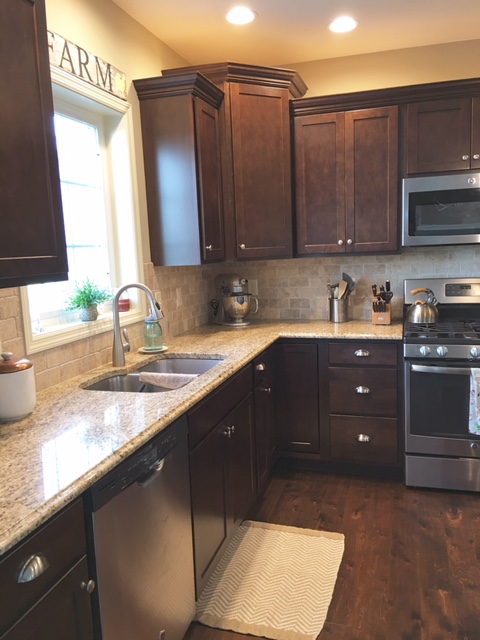
Life has been busy lately, so my DIY projects have taken a back seat. This week, I finally got around to tackling the exciting project of adding hardware to our kitchen cabinets. It sounds easy enough, right? I looked at a few tutorials on Pinterest and felt confident in my abilities. Boy, I totally underestimated the amount of measuring and patience installing cabinet pulls would require! I think I represent a pretty big group of us who try to be handy and teach ourselves fairly simple skills by reading tutorials and watching YouTube. That’s why I’m happy to share my experience and mishaps so that maybe you can do it a little better 🙂
Buying hardware from the right place
Its easy and convenient to buy cabinet hardware at your local hardware store. However, it can be WAY cheaper to make this purchase online. I compared prices, and actually bought the contractor packs of cabinet pulls in store. Knobs on the other hand, were priced best at build.com. Their selection and prices are great! The knobs I chose come in many finishes.


Adding knobs
Start with the template
I measured up 2 1/2 inches (this was a common suggestion online) and centered where the knobs would go. You can buy plastic templates or make your own with the cardboard box your knobs come in. 🙂

Be sure to label your templates so you don’t get the right and left or top and bottom ones mixed up. Also, if you turn the top left template around and upside down, you have your bottom left template (same goes for the right template).
Tackle one step at a time
I felt overwhelmed when starting this project, so many cabinets!! So I decided to take it one step at a time, starting with all the upper left cabinets.

The upper right cabinets were next, then bottom left and finally bottom right. Each “section” that was completed provided a sense of accomplishment and kept the momentum going.
Adding pulls
I knew installing pulls would be more difficult than the knobs, but I really struggled. A plastic template was worth the $3 to get the 3 inch spacing just right. I broke off the side pieces so it would lay flat against my drawers.


I found it was much easier to measure with my sewing tape verses a regular tape measure, it was easier to manipulate and it didn’t snap back on my fingers. When getting started, I noticed the drawers had an extra layer of wood that the cabinets didn’t have. The screws that came with the hardware were too short to extend thought both pieces of wood. I either had to buy all new screws or a drill bit to countersink the screws though the back piece of wood. I opted to go the countersink route. Below, you can see the extra piece of wood I’m referring to.

Measure and measure again
Using painters tape, mark the center of each drawer. Use a level to mark your lines.

Next mark the center of your template and line it up with the center of your drawer. Mark your drill spots.

You better measure it one more time before you start drilling holes…
My first drawer was a disaster, first I didn’t countersink deep enough for the screw to protrude through the front, but then the screw was stuck!! It took almost an hour to get it out…. that hour was full of lots of swear words and tears. (I’m so glad I was home alone!) Once I got it out and made the hole deep enough, I attached the pull. I stepped back to admire my hard work and it was WAY off-center. More tears. I almost gave up at this point. I put on my big girl pants, bought some wood filler and a stain marker, and moved on. Luckily, things went smoother from there.
Did you measure a third time? Okay, now drill
Once the holes were drilled, I used the countersink bit to go through the back piece of wood.


Add the screws and tighten your hardware! This was an all day affair in between taking care of my little one. The actual process isn’t difficult, it’s just tedious with all the measuring and marking. Not only did it save us a few bucks, (although, after the wood filler and stain marker, I’m not sure it saved us that much. Ha!) it gives a sense of accomplishment to upgrade the look of your house on your own.
Before and after


Thanks for stopping by the blog! Don’t forget to subscribe and follow me on Instagram for behind the scenes sneak peeks!


Great job! You blow me away with your skills!
You’re too sweet 😊😘