
Need an idea for an inexpensive, personalized gift this holiday season? You’re in the right spot! I’m excited to share a quick tutorial on transferring your favorite photo to wood. I made a DIY wooden photo ornament to hand out to the grandparents at Thanksgiving, and I think they were a hit 🙂
There are a few tutorials online on transferring photos to wood, a lot of them gave me a headache. This one is actually pretty easy as long as you have a printer with a scanner at home. I’m not especially tech savvy, so its possible this project could be even easier for you.
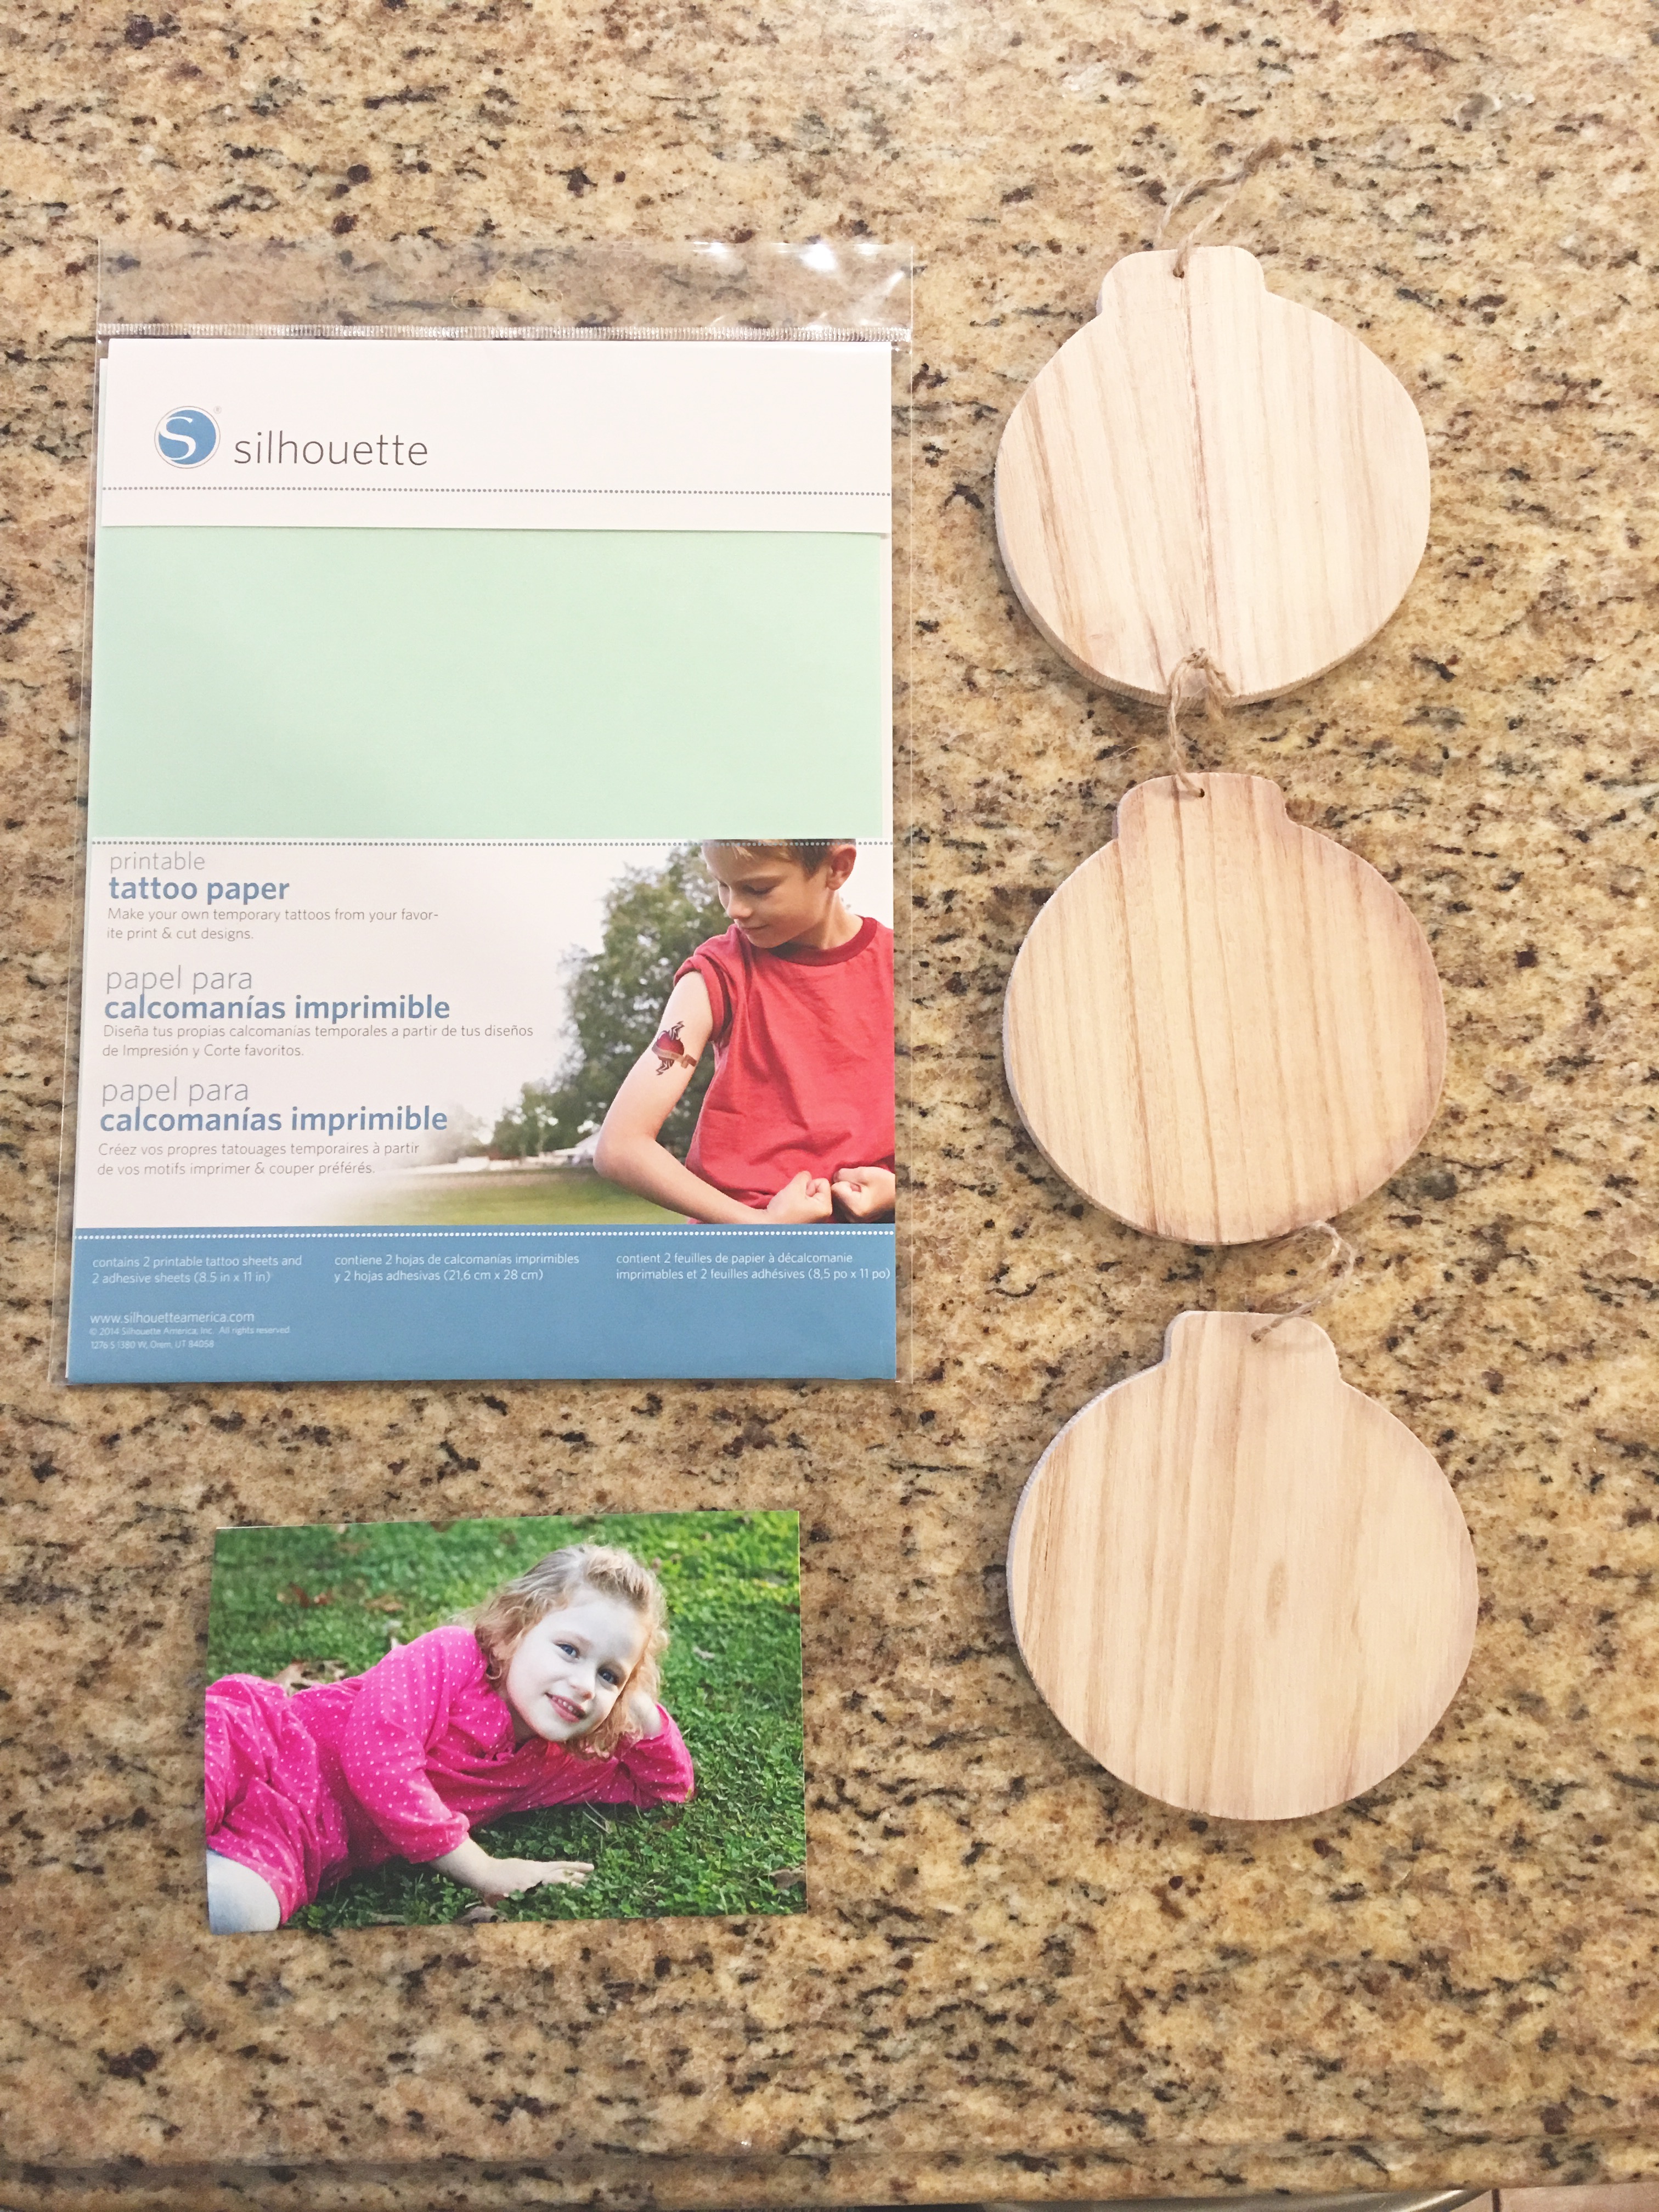
Lets get down to it. The star of the show…
Tattoo Paper!
This is something I didn’t even know existed!

You’ll need:
- tattoo paper (I found it next to the cricket materials at Joanne Fabric)
- wooden ornaments or plaque (can be found at most craft stores)
- a picture (preferably inverted, I used the free app by Photo Shop Express)
That’s it, I love a short supply list!
Let’s start the transferring process 🙂
Here’s where I may be making things more difficult than they need to be.
- I printed a couple of copies of my inverted photo at Walgreens
- I put them in the copier part of my printer and printed the copies on the tattoo paper. I’m sure there is a way to directly print the photos onto the tattoo paper from the computer, but I’m not that competent. (mostly because I wanted two images on the same sheet of paper)
- Next, follow the instructions on the temporary tattoo paper to get them ready to transfer
- Once you remove the protective sheet, the image will be sticky, just like a tattoo
- Stick the image facedown on the ornament


- Cut the picture to size

- Apply a wet cloth to transfer, just like you would with a regular temporary tattoo

- This is where you have to be patient, make sure it is really wet, and remove the white backing very slowly so you don’t lose your image
- Allow to dry

Finally, you could paint the edges or write a little message on the back to complete the look, or you can leave it natural like I did. I really enjoyed this DIY wooden photo ornament project and I hope you get a chance to try it out!


