
I’ve finally finished my last project before baby arrives! I got a last-minute spurt of energy and decided to do a dresser makeover in our master bedroom nursery nook. When we moved into our new house last summer, my in-laws gave us a very sturdy bedroom set; it consisted of a large dresser, an armoire and two nightstands. The wood is beautiful, but we didn’t love the matchy-matchy look of a bedroom set, so we knew we wanted to change a couple of the pieces and make them our own. In this post, I’ll show off the before and after photos of the dresser!
Master bedroom nursery nook
As I’ve mentioned in the past, we’re setting up a little nook in our master bedroom for the nursery. Now seemed like the perfect time to shift my decorating focus to this space. I didn’t want to do anything too babyish that we would have to change once we move the baby out of our room. I love deep blues and greens, so when picking a paint, I went with this beautiful blue-grey called Opera Gown. It’s really a chameleon color, depending on the lighting or colors your place it with it can look more deep blue, or grey.
Dresser makeover
I’ve worked with Valspar chalky finish paint in the past and had great luck with it, so I knew this was the right product for this project! Also, I LOVE that there is ZERO prep work, aside from dusting off the surface. The hardware and drawers were removed before I started painting. I used two coats of Valspar chalky finish paint in Opera Gown. I didn’t read the instructions very well, which say to wait 24 hours before recoating. Instead, I thought I read “overnight” which I interpreted as 8-ish hours before applying a second coat. Either way, it worked out. I did wait about 24 hours after applying my second coat of paint to start the waxing process. Using the soft wax is easy, but tedious. I just worked in small sections, applying it with a paint brush, letting it sit for a minute or two, then using an old t-shirt to wipe off the excess. I waited a few days to put anything on the surface and replace the drawers to really let the wax harden.
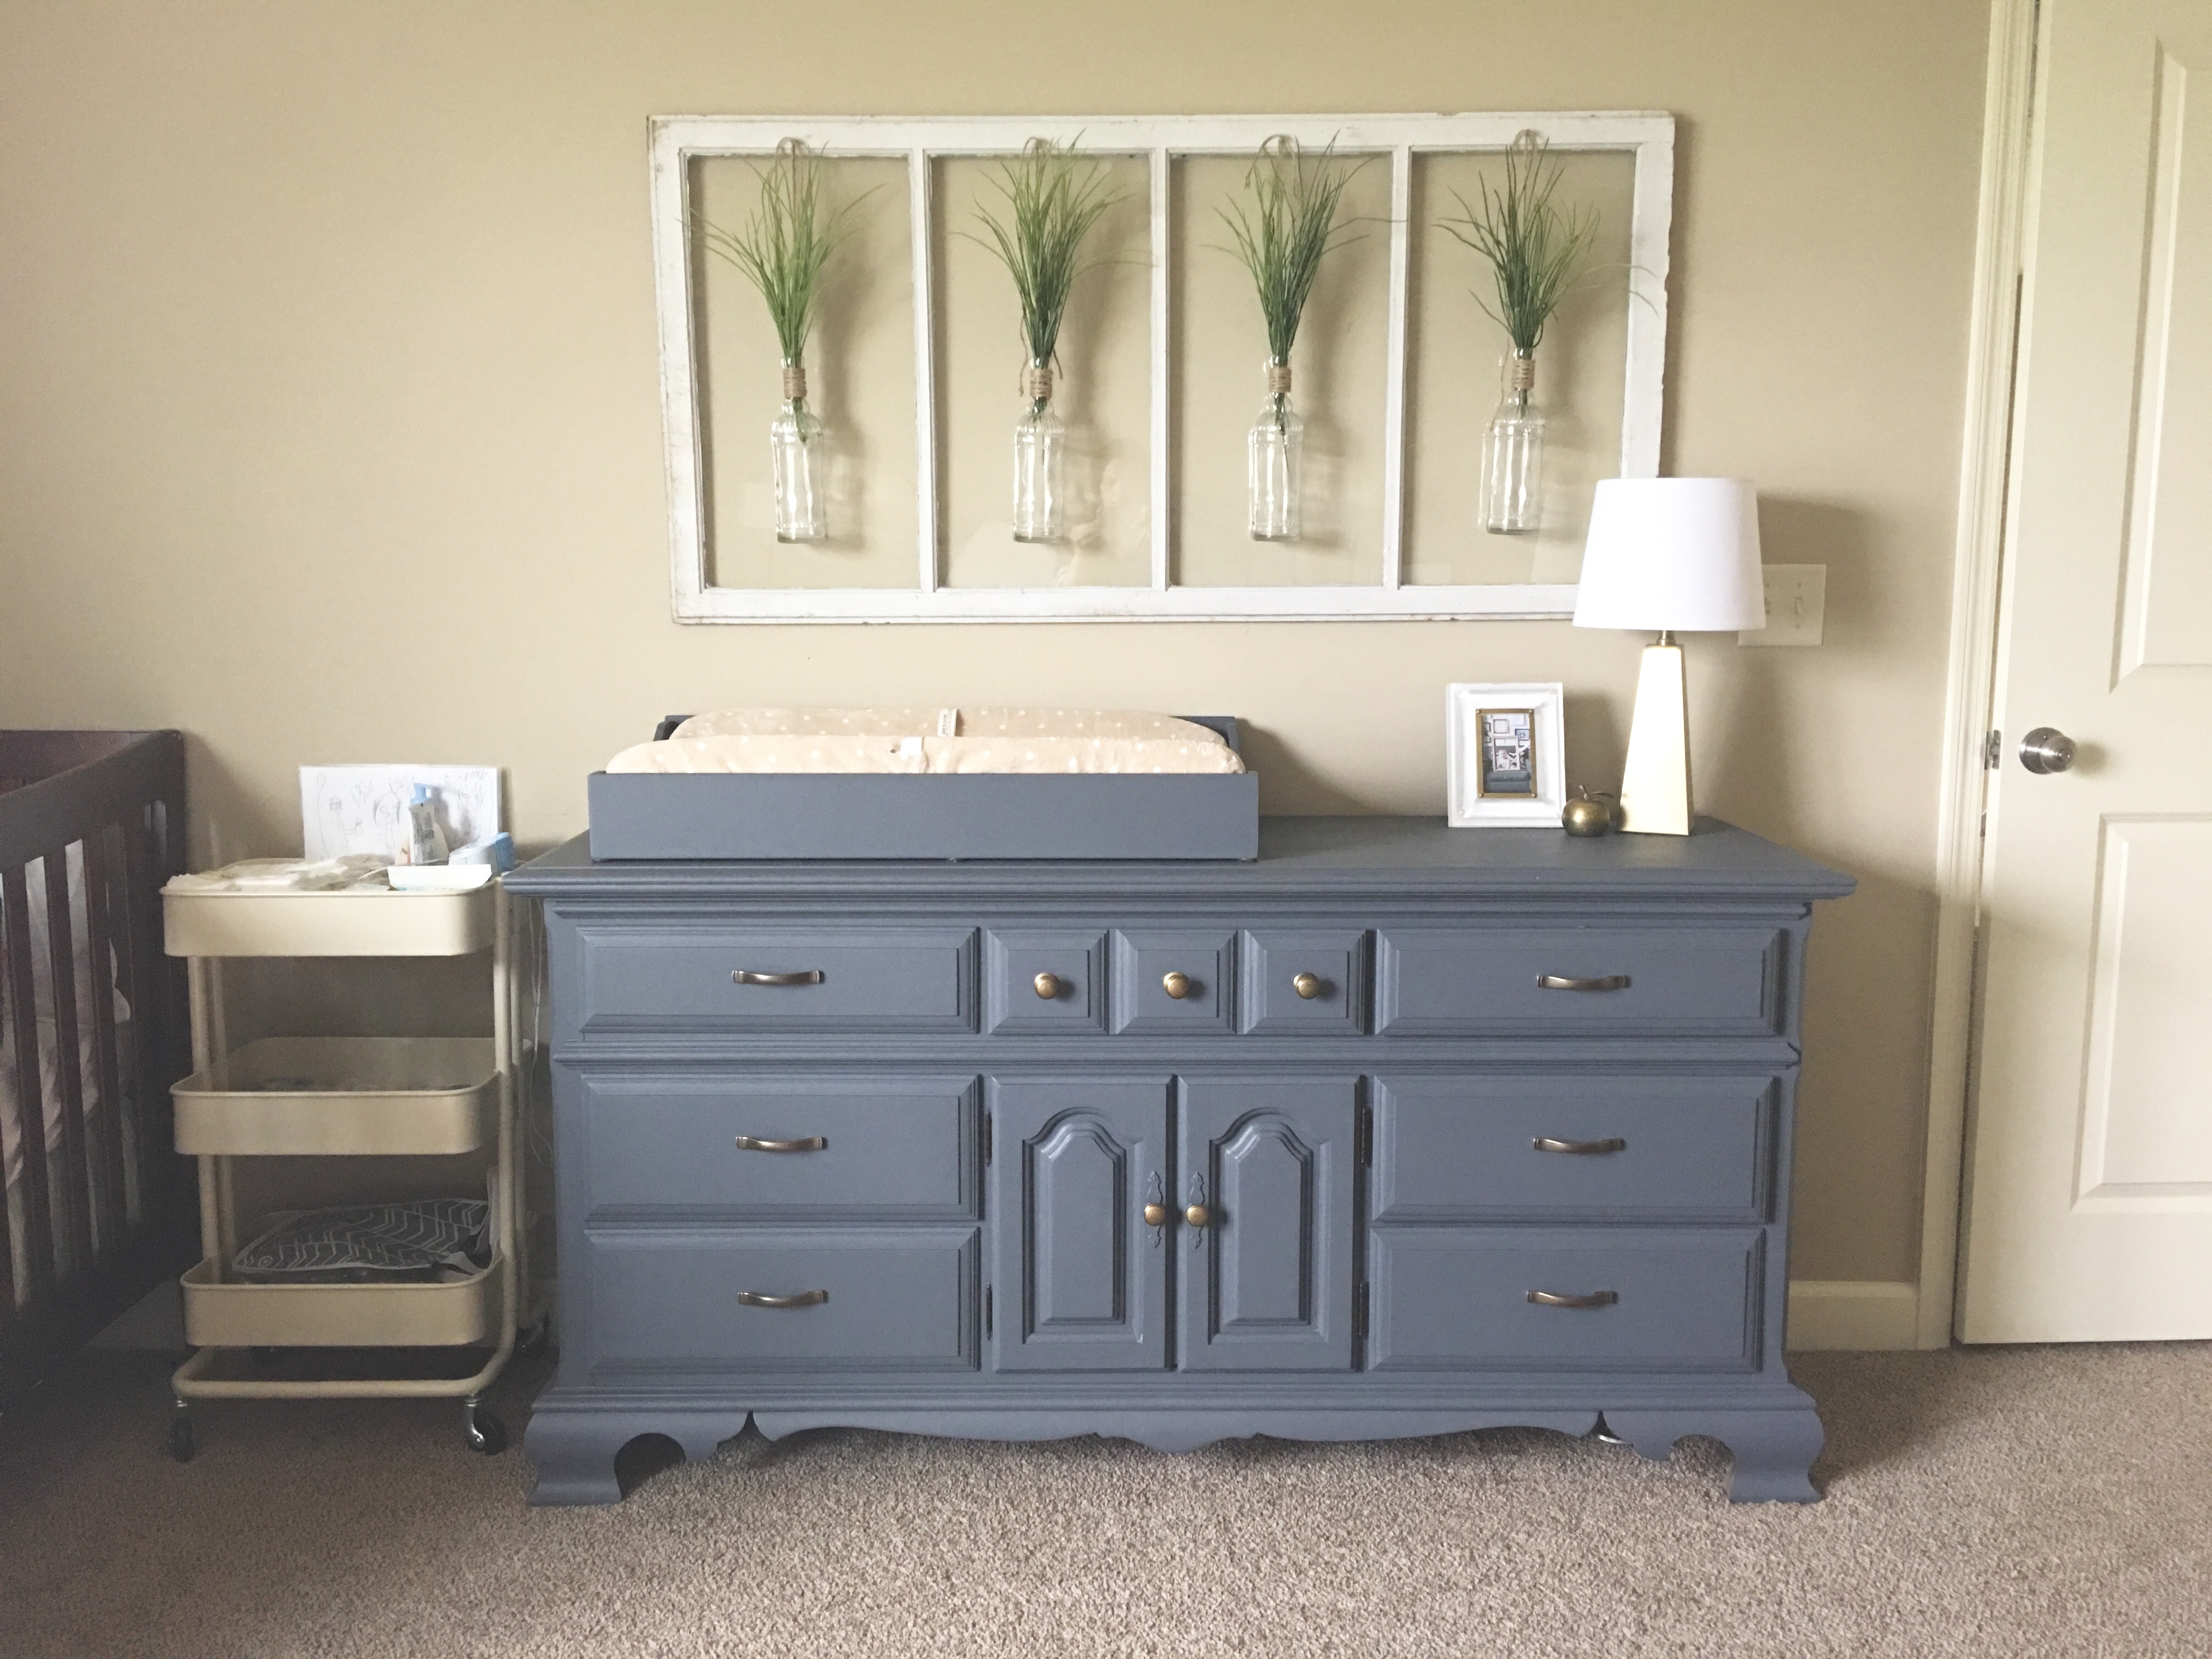
Now for the unveil 🙂
Before


After


(For the tutorial on the window hanging above the dresser, click here.)
A huge thank you to my friends at Valspar who sponsored this post! As always, all opinions are honest and my own.
I’m so happy with the outcome and I hope you found some inspiration to upcycle something of your own 🙂


I really like this color it’s perfect for this space
Thanks! I’m happy with how it turned out 🙂