
How many DIY chalkboard tutorials have you seen on Pinterest? About a million, right? Well, I’m sharing the EASIEST DIY chalkboard tutorial! I liked this project because I got to use paint and power tools, but it was just enough of each to make it feel like a real DIY project.
This giant chalkboard was made for a VIC (very important client), my mother-in-law 🙂
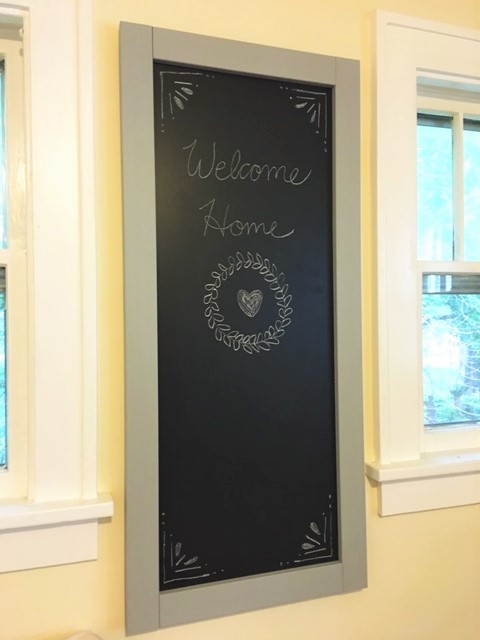
There was a small empty space between two windows in her kitchen. She asked if I could make a chalkboard to fit the space, and I happily accepted! I originally planned on buying some MDF board and painting it with chalkboard paint. For the frame I planned on buying wood, having it cut, and then painting it. I went to my usual hardware store and had everything in my cart, but when I asked to have the wood cut to size, they informed me that the saw was out-of-order. *EYE ROLL* I was annoyed that I spent 30 minutes picking out my supplies just to be told I can’t have any of it cut down to fit in my car. That’s life, though, roll with it. I left without buying anything, and boy am I glad I did.
That evening, I decided to check out Home Depot. Oh my gosh. They had a WAAAAYYYY larger selection of MDF boards! Home Depot had a smaller MDF board that was already painted with chalkpaint!!! I also found a cheaper material for the frame. Since I was painting it, I went with a primed trim board. If I had planned on staining the trim, I would have gone with a solid wood board for the grain. I planned on using paint I already had on hand, but beyond that, this project cost lest than $30.
Supply List
- MDF chalkboard
- Trim boards (2.5inch primed MDF board)
- screws
- picture hanging kit
- power drill
- paint
Have the employees at the hardware store cut your chalkboard and trim boards to size. I wanted my finished product to be 47″x21″, so I had them cut my chalkboard to 46″x20″ and I had them cut my trim boards into (2) 16″ pieces and (2) 47″ pieces.

Paint your trim boards. I used my leftover chalk paint from a previous project.

Once your boards are nice and dry you can start assembly. Here’s where the power tools come in! Drill holes and screw the chalkboard to the trim, and be sure to really reinforce the corners. My screwing was a little messy because I was working with an almost dead power drill, but you get the idea.

If you plan on hanging your chalkboard, screw in the screw eyes and attach the picture wire.


Variations
I wanted very specific dimensions, but if you are okay with a more standard size, you can simplify this project even more! Search garage sales, thrift stores (or even curbs!) for old wooden picture frames to use as your trim. In this case, you would just have your chalkboard cut to size and screw directly to the back of the frame.
Here it is! The EASIEST DIY chalkboard 🙂


Thank you so much for visiting the blog today, and I hope you’ve been inspired to take on your own little DIY project this weekend 🙂
I would love to hear about variations you come up with!


Home Depot FTW!!