
Last week, I left you with my painted, but unfinished orb light. This weekend gave me a chance to get down to business and finish my project. I’m so excited to share the final product with you!
Part one recap
Just a refresher, this is where last week left off.

My rusty Hobnob market find got a beautiful satin nickel finish with Rust-Oleum Universal spray paint and primer.
I also spray painted the area of the light kit what would be exposed… I did not paint the cords. (we will get to that later) Just duct tape off the area you screw the bulb into before painting.

Add electrical
I’ve been dragging my feet a bit because, although I had a light kit, I wasn’t exactly sure how I was going to use it to bring my orb to life. Awhile ago, I purchased the HEMMA triple pendant light kit at Ikea.

I had to modify the light kit because my existing faceplate had a very narrow opening to thread my cords into the electrical box.
***Follow the instructions for your specific light kit, and always obey the wattage max. If you are unsure of what you are doing or have any questions, consult an electrician. Obviously, TURN OFF power to the light you are replacing.***
The wires were way too long. I measured and cut them to the appropriate length.


I mentioned the wires were too thick to fit through my existing faceplate, so I removed the white outer part very carefully with wire strippers, just to expose the white and black wire for each pendent without damaging them.

Covering the cords
Next, I covered the white cord with washi tape! I originally wanted to wrap them with twine, but that seemed a little tedious and the light bulb went off at the craft store 🙂 I found a pretty wood grain washi tape at Michael’s, I liked that it added a twig-like look.

Since it was a thicker tape, I ripped it into smaller strips and covered the cords by wrapping and ripping, wrapping and ripping, etc.


I love that the washi tape doesn’t have to be perfect! The texture and slight peeling make it look like birch branches. Next gently weave your cords up the chain to the electrical box. (I used the existing chain from my old light fixture.)

Pull the wiring into the electrical box.

Now the light just hooks up like a usual light fixture.
***Again, if you are unsure or have questions, call an electrician.***
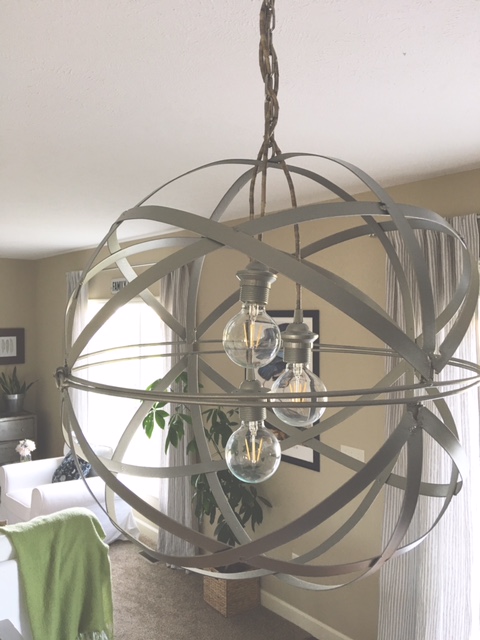
After everything is wired together and taped with electrical tape, replace the faceplate and add your bulbs. I splurged for these Edison style LED bulbs.
Ta-da!!! So much better than the original builder grade light fixture!!
Before & After


Thank you so much for stopping by the blog today, and don’t forget to subscribe and follow basicallylizblog on Instagram for extras! 🙂


